7 Tips for Packing Plastic Bottles for Safe Shipping?

Time:2026-09-30 Author:Mason
0%

Plastic bottles look sturdy, but thin walls, loose caps, and shifting cartons can turn a routine delivery into a leak or a dented mess. The U.S. Environmental Protection Agency reported that containers and packaging generated 82.2 million tons of municipal solid waste in 2018, about 28.1% of the total. That figure covers many packaging types, not plastic bottles alone, yet it highlights why packaging choices deserve care. Small details matter.

How to pack plastic bottles for safe shipping starts with the bottle itself: check for cracks, close the cap firmly, and protect the closure from pressure. A sealed inner bag adds a practical barrier if a bottle leaks. Use cushioning that prevents bottles from knocking together, then fill empty carton space so contents cannot slide when the box is tilted. This sounds simple. It is easy to miss one gap.

For a more evidence-based approach, consult the International Safe Transit Association’s ISTA 3A procedure, which evaluates packaged products through distribution-related tests such as vibration and shock. ASTM D5276 also provides a test method for evaluating loaded containers under free-fall impact. These standards can guide packaging decisions, but they do not guarantee every parcel will arrive undamaged. The seven tips below translate those principles into clear packing steps, with attention to bottle shape, cushioning, carton strength, and a final shake check. A little extra care can prevent a very avoidable cleanup.
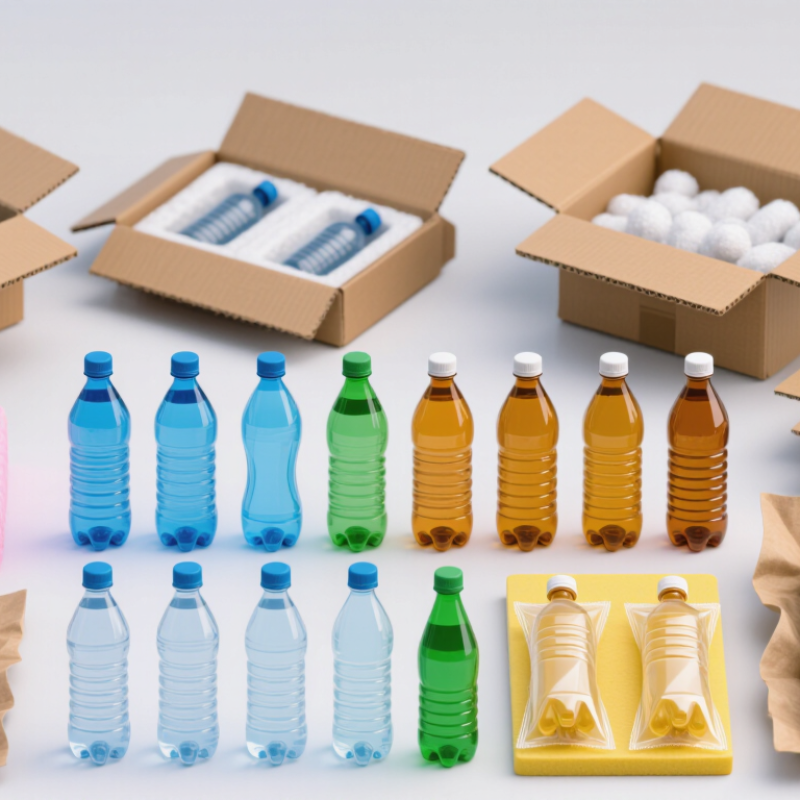
7 Tips for Packing Plastic Bottles for Safe Shipping?

Identify Bottle Materials, Shapes, and Shipping Risks

7 Tips for Packing Plastic Bottles for Safe Shipping

Identify the bottle material before choosing packaging. PET bottles are lightweight and clear, but they may crack under sharp pressure. HDPE bottles usually tolerate impact better, yet their flexible walls can deform. Thin plastic needs more support than its appearance suggests. I learned this after finding dented bottles inside an undamaged outer carton.

Tip 1: Check the resin type and wall thickness.
Tip 2: Inspect caps, necks, and seams for weak points.

Bottle shape also controls shipping risk. Round bottles roll and may shift during handling. Flat bottles stack easily, but broad panels can buckle. Tall containers often tip when the box has empty space.

Tip 3: Match the insert to the bottle’s shape.

Tip 4: Keep each bottle separated from its neighbors.

Tip 5: Use cushioning around the neck and base, not only the sides.

Small movement becomes serious movement during repeated drops.

Consider temperature, pressure, and orientation during transit.

Heat can soften some plastics and increase internal pressure. Cold conditions may make certain bottles less flexible.

Tip 6: Leave suitable headspace for liquid expansion, following the product’s specifications.

Tip 7: Seal the carton firmly and mark the correct orientation when needed.

A practical test is a gentle shake, followed by a controlled drop test. It is not perfect, but it reveals loose packing quickly.

Recheck the design after every packaging change.

Choose Protective Closures and Leak-Prevention Supplies

7 Tips for Packing Plastic Bottles for Safe Shipping

Choose a closure that matches the bottle neck and liquid inside. A cap that feels tight may still leak during pressure changes. Select a compatible liner, gasket, or plug for the product. Material compatibility matters more than appearance.

Inspect every cap for cracks, warped threads, or damaged sealing surfaces. Tiny defects can release liquid slowly. Apply consistent closing pressure, preferably with a calibrated torque tool. Hand tightening is convenient, but it creates uneven results.

Add a tamper-evident band or neck seal when the package needs visible protection. Use sealing film only when it suits the bottle material and product. Place each bottle inside a leak-resistant plastic bag with an absorbent pad. The pad should cover the likely spill area, not sit loosely nearby.

Keep bottles upright with dividers, molded inserts, or firm cushioning. They should not touch each other during handling.

Leave no empty space around the closures. Movement creates stress.

I once packed bottles with strong caps but skipped the secondary bag. One loose closure damaged the carton. That mistake changed my checklist.

Test a sample package by turning it upside down, gently shaking it, and checking for moisture. Temperature and vibration can expose weaknesses. Recheck the closure after testing. Some packaging choices look secure but fail after repeated movement. Keep packing records for closure type, torque, liner, and test results. Small details matter.

Clean, Dry, and Secure Each Bottle

Clean, Dry, and Secure Each Bottle

Packing plastic bottles safely begins with preparation, not tape. Rinse each bottle with suitable clean water, then inspect the neck, cap, and seams. Any residue can create odors, stains, or moisture inside the carton. Let bottles air-dry completely, preferably overnight. A few hidden drops can weaken cardboard and damage labels. I once packed bottles too soon after washing. The outside looked dry, but condensation appeared during transit.

Tips:

  1. Remove loose caps and check their threads.
  2. Tighten each cap by hand without forcing it.
  3. Place a small leak-resistant seal beneath the cap when appropriate.
  4. Wrap every bottle separately with cushioning material.
  5. Keep bottles upright when their shape allows it.
  6. Use dividers so plastic surfaces cannot rub together.
  7. Add an absorbent layer inside the inner container, not directly inside the bottle.

Secure the bottles in a strong inner box, leaving little empty space around them. Fill gaps with paper padding or foam that will not shed easily. Then place the inner box inside a durable outer carton. The outer carton should close flat, without bulging sides. Shake it gently before sealing. Movement means more padding is needed. Do not rely on appearance alone; a neat package can still fail at the corners. I prefer testing one packed sample before preparing a large shipment, although this extra step is easy to skip. Shortcuts often reveal themselves later.

Wrap Bottles and Add Cushioning to Prevent Impact

7 Tips for Packing Plastic Bottles for Safe Shipping

Plastic bottles need protection from pressure, movement, and sudden impact. Check every cap before packing, then squeeze each bottle gently for leaks. A loose cap can ruin the whole shipment. Place a thin seal beneath the cap when suitable for the bottle design. I once underestimated small gaps inside a box. The bottles arrived intact, but several had shifted badly.

Tip 1:Wrap every bottle separately with bubble cushioning or thick paper. Cover the neck, cap, and base carefully. Secure the wrap without crushing the bottle.

Tip 2:Add a cushioning layer across the box bottom. Keep bottles away from the cardboard walls. Their surfaces should not touch each other directly. Use dividers when several bottles share one package.

Tip 3:Fill empty spaces with soft packing material. The bottles should stay still when the box is gently shaken. Do not pack them so tightly that the plastic bends.

Tip 4:Place heavier bottles below lighter ones, if the package contains different sizes. Keep caps facing upward when possible. A small leak becomes harder to control otherwise.

Tip 5:Choose a strong, correctly sized carton. Oversized boxes need excessive filler and may shift during handling. I still review this step twice, because “almost full” is not secure enough.

Arrange, Seal, and Label the Shipping Box

Packing plastic bottles safely depends on how the box is arranged, sealed, and labeled. Choose a strong corrugated box with little empty space. Inspect every bottle for cracks, loose caps, or weak seams. Clean and dry the bottles before packing. Moisture inside the box can weaken cardboard and damage labels.

Tip 1

Arrange bottles upright in a single, stable layer when possible. Place dividers between them to prevent rubbing and impact. Wrap each bottle with cushioning material, especially around the cap and shoulder. Add firm padding on the bottom, sides, and top. The bottles should not shift when you gently shake the closed box. I once underestimated small gaps, and the contents arrived scuffed. That mistake changed my packing routine.

Tip 2

Seal the box with strong packing tape across every main seam. Reinforce the corners if the box feels heavy. Press the tape firmly against dusty or uneven cardboard. Do not rely on one narrow strip.

Tip 3

Apply a clear shipping label to the largest flat surface. Keep it away from seams and edges. Add handling notes only when they accurately describe the package. Check the destination, return details, and quantity before closing the box. A second inspection helps, though I still occasionally miss a crooked label. Take a quick photo of the sealed package for your records.

FAQS

How should I choose a closure for a plastic bottle?

Match the closure to the bottle neck and liquid. Material compatibility matters more than appearance. A tight-feeling cap can still leak during pressure changes.

What should I inspect before closing each bottle?

Check the cap, threads, neck, and sealing surface. Look for cracks, warping, or residue. Tiny defects can release liquid slowly.

Is hand tightening enough for shipping?

Hand tightening is convenient but uneven. Use consistent pressure whenever possible. A calibrated torque tool gives more reliable results. I sometimes underestimate this difference.

Should every bottle have a secondary leak barrier?

Place each bottle inside a leak-resistant plastic bag. Add an absorbent pad over the likely spill area. Keep the pad positioned firmly. Do not leave it loose nearby.

How can I stop bottles from moving inside the carton?

Keep bottles upright when their shape allows it. Use dividers, molded inserts, or firm cushioning. Bottles should not touch each other. Empty space creates stress.

How dry should bottles be before packing?

Bottles should be completely dry before packing. Air-drying overnight is safer. Hidden drops may create condensation, odors, stains, or weak cardboard.

What packaging structure provides better protection?

Use a strong inner box with little empty space. Fill gaps with clean paper padding or suitable foam. Place the inner box inside a durable outer carton. The outer carton should close flat.

How can I test whether a packed bottle is secure?

Turn one sample package upside down and gently shake it. Check for moisture afterward. Recheck the closure. Temperature and vibration may expose weaknesses. One test is better than none.

Conclusion

How to pack plastic bottles for safe shipping begins with understanding the bottle’s material, shape, size, and possible shipping risks. Check whether each bottle is rigid, flexible, empty, or filled, then choose closures that fit securely and add leak-prevention supplies such as inner seals, protective caps, or absorbent materials when appropriate. Before packing, clean and completely dry every bottle, remove residue, and ensure each cap is tightly secured. If the bottles contain permitted, non-hazardous contents, leave suitable space for pressure changes and inspect them for cracks or weak seams.

Wrap each bottle individually with cushioning material, paying extra attention to caps, corners, and areas that may be crushed. Arrange the bottles inside a strong shipping box with dividers or padding so they cannot strike one another or move freely. Fill empty spaces, seal all openings firmly, and reinforce the bottom and edges with packing tape. Finally, apply clear handling labels, include any necessary shipment information, and test the package by gently moving it to confirm that nothing shifts or leaks.

Mason

Mason

Mason is a seasoned marketing professional with a deep expertise in the company's offerings and a passion for driving brand awareness. With a strong background in digital marketing strategies, he has an innate ability to connect with diverse audiences and effectively communicate product benefits.......